

Product Master Data: Categories, Brands, and Units
Before the shop can record purchases and sales, products need an “address”: which category, which brand, counted per what. This 15-minute tutorial sets up that address — once done, every transaction becomes pick-from-a-list.
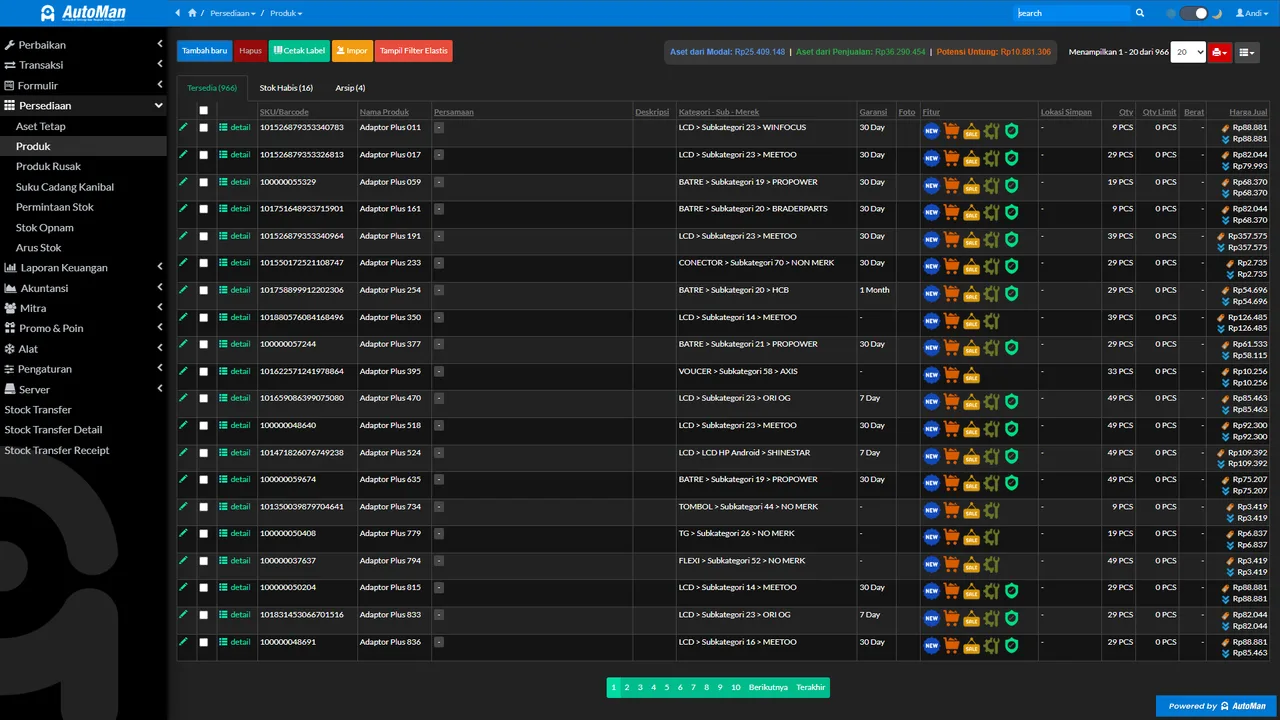
The principle matches the repair master: just enough first, tidy as you go. Automan doesn’t demand a perfect master before starting — quick-add is always available inside transaction forms for items not yet registered.
Before you start
- The first-day 30-minute setup is done.
Steps
-
Open Settings → Inventory
Product Categories, Product Sub-Categories, Product Brands, and Quantity Units are all managed from Settings → Inventory. These four are the "shelves" your products will attach to — filled once, used in every transaction.

Categories, brands, units = the shelves products attach to. -
Create Product Categories and Sub-Categories
A healthy example at a counter: Parts → LCD, Battery, Connectors; Accessories → Cases, Chargers, Screen Protectors. At a workshop: Parts → Brake Pads, Filters, Spark Plugs; Fluids → Engine Oil, Brake Fluid. Start with just 5–10 broad categories. Over-detailed categories early on slow input down and make reports harder to read.

Start with 5–10 broad categories — don't over-detail early. -
Create Product Brands
Brands make search fast and reports readable per brand — "which LCD brand sells most?" at a counter, "which oil brand moves fastest?" at a workshop. Enter only the brands you actually sell first.

Brands make search fast and reports meaningful. -
Create Quantity Units
Pcs, box, meter, set — matching how you buy and sell. Consistency is the key: one item, one base unit; never sometimes pcs and sometimes box for the same product.

One item, one base unit — consistent. -
Create your first products
Create the most frequently used products: a clear name (e.g. "LCD A52 ORI" or "Front Brake Pads Avanza"), a unique SKU/code, then attach the category, brand, and unit. Don't worry about cost price now — it fills in automatically from purchase transactions.

Cost price fills in later, automatically, from purchases. -
Check the result in a transaction form
Open the purchase form or the register: product search now finds your items complete with their units. Products you haven't created yet can be added via quick-add straight from the form — this master is the foundation, not a prison.

Transaction dropdowns now filled — ready to buy and sell.
What you end up with
Categories, brands, and units organized; the first products ready to use — purchases and sales can start without empty dropdowns, and per-category/per-brand reports are meaningful immediately.
If something goes wrong
Categories already too many and messy
Merge into broad categories and leave the detail in product names. It's easier to split a category later when the data truly grows than to tidy dozens of empty ones.
The same product recorded twice
One product, one SKU. Before creating a new product, search its shortest keyword first — quick-add shows search results too, precisely to prevent duplicates.
Product data already lives in hundreds of Excel rows
Don't retype — use the import-products-and-stock-from-Excel tutorial. Still prepare the category/brand/unit masters first so the import lands tidy.