

Intake and Pickup Receipt Settings
The receipt is the face of the shop that goes home with the customer. Fifteen minutes shaping these templates makes every later print automatically tidy: sized to the printer, key information visible, tracking code embedded.
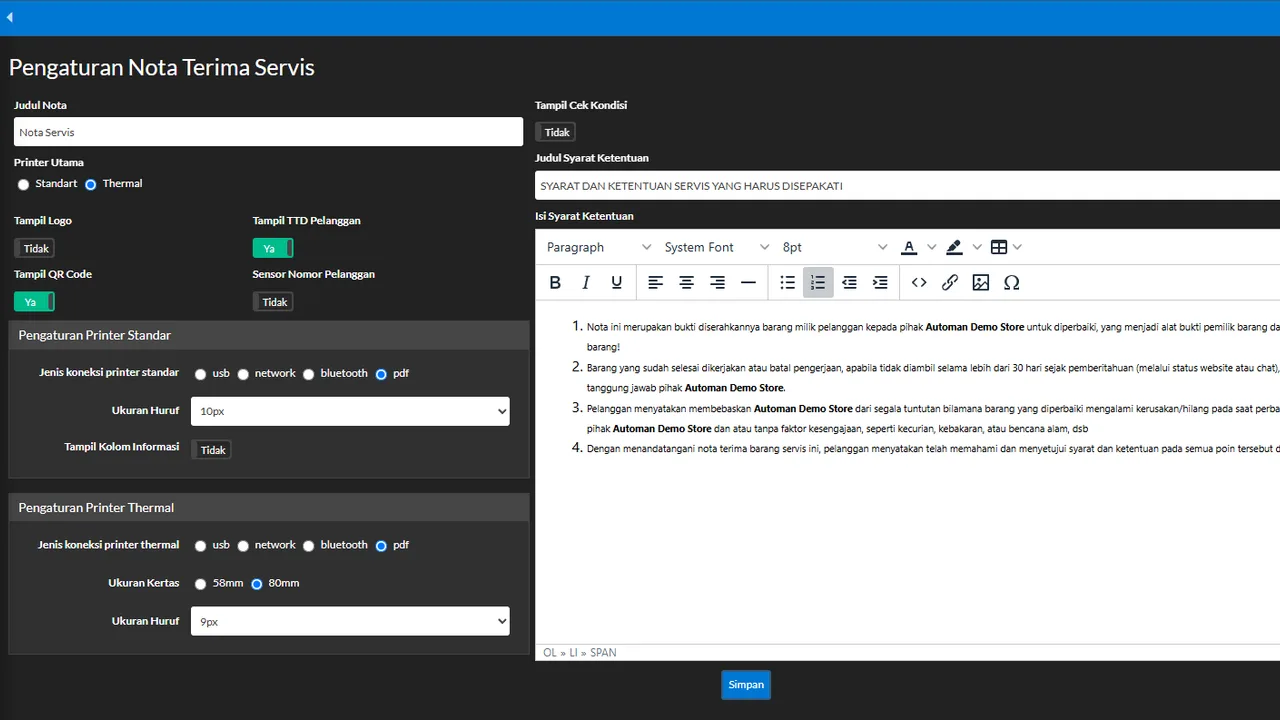
Two receipts get configured: the intake receipt (when the unit arrives — complaint, estimate, tracking code) and the pickup receipt (when the unit goes home — work, final cost, warranty).
Before you start
- The shop identity is filled in (name, logo, address).
Steps
-
Open Settings → Repairs → Intake Receipt
The intake receipt is the document the customer takes home when the unit comes in. Its entire appearance is configured from here.

The intake receipt's appearance is configured from here. -
Match it to the shop's printer
Pick the size that matches your printer (e.g. 58mm/80mm thermal). Wrong size = a cropped receipt or wasted blank space — set it once, right forever.

Match the printer — set once, right forever. -
Choose the information shown on the intake receipt
Shop identity, unit data, the complaint, the estimate, up to the tracking code/QR — show what's useful to the customer. A clear receipt cuts repeated questions.

A clear receipt cuts repeated questions. -
Style the header and footer to taste
The header/footer can carry content (a thank-you, warranty terms) or be removed for a plain receipt — both valid, match the shop's style.

Filled or plain — match the shop's style. -
Repeat for the Pickup Receipt
Open Settings → Repairs → Pickup Receipt and configure it the same way. The pickup receipt carries the work summary, final cost, and warranty — the transaction's closing document.

The pickup receipt = the closing document: final cost + warranty. -
Test-print from a real transaction
Print one intake and one pickup receipt from a test transaction. Read them as a customer: enough information? Anything cropped? Adjust until it fits.

Read the print as a customer, then adjust.
What you end up with
Intake and pickup receipts print cleanly per the shop's printer and style — the important information (estimate, tracking code, warranty) reaches the customer's hands without misprints.
If something goes wrong
Prints come out cropped or messy
Check the paper size in the receipt settings vs the printer in use — the two must match. After changing, test-print again.
Want a receipt without header/footer
Empty/disable the header-footer sections in the receipt settings — the receipt prints plain without changing the transaction's content.
The tracking code doesn't show on the receipt
Make sure the tracking code/QR option is enabled in the intake template and the Repair Tracking feature is active (Settings → Repairs → Repair Tracking).